Over the last two weeks I've got round to making digital negative curves for Cyanotype and Argyotype alternative photographic processes. I'm doing this for a couple of reasons: 1) larger prints, even than 10x8 film negatives - but particularly for smaller-format photographs; 2) the possibility of digitally remedying exposure- or film-developing errors in my 10x8 negatives.
I’m aware that there is a range of ways of making digital negatives; the information is available on Youtube and in books, but rather disparate.
I’ve basically picked this up from a standing start in a couple of weeks, but my first attempts have been successful: I have independently made my own Cyanotype curve that prints with my setup (UV lamp, paper, water, etc.) better than the curve presented in Christina Anderson’s Cyanotype book, so I'm pretty delighted at this.
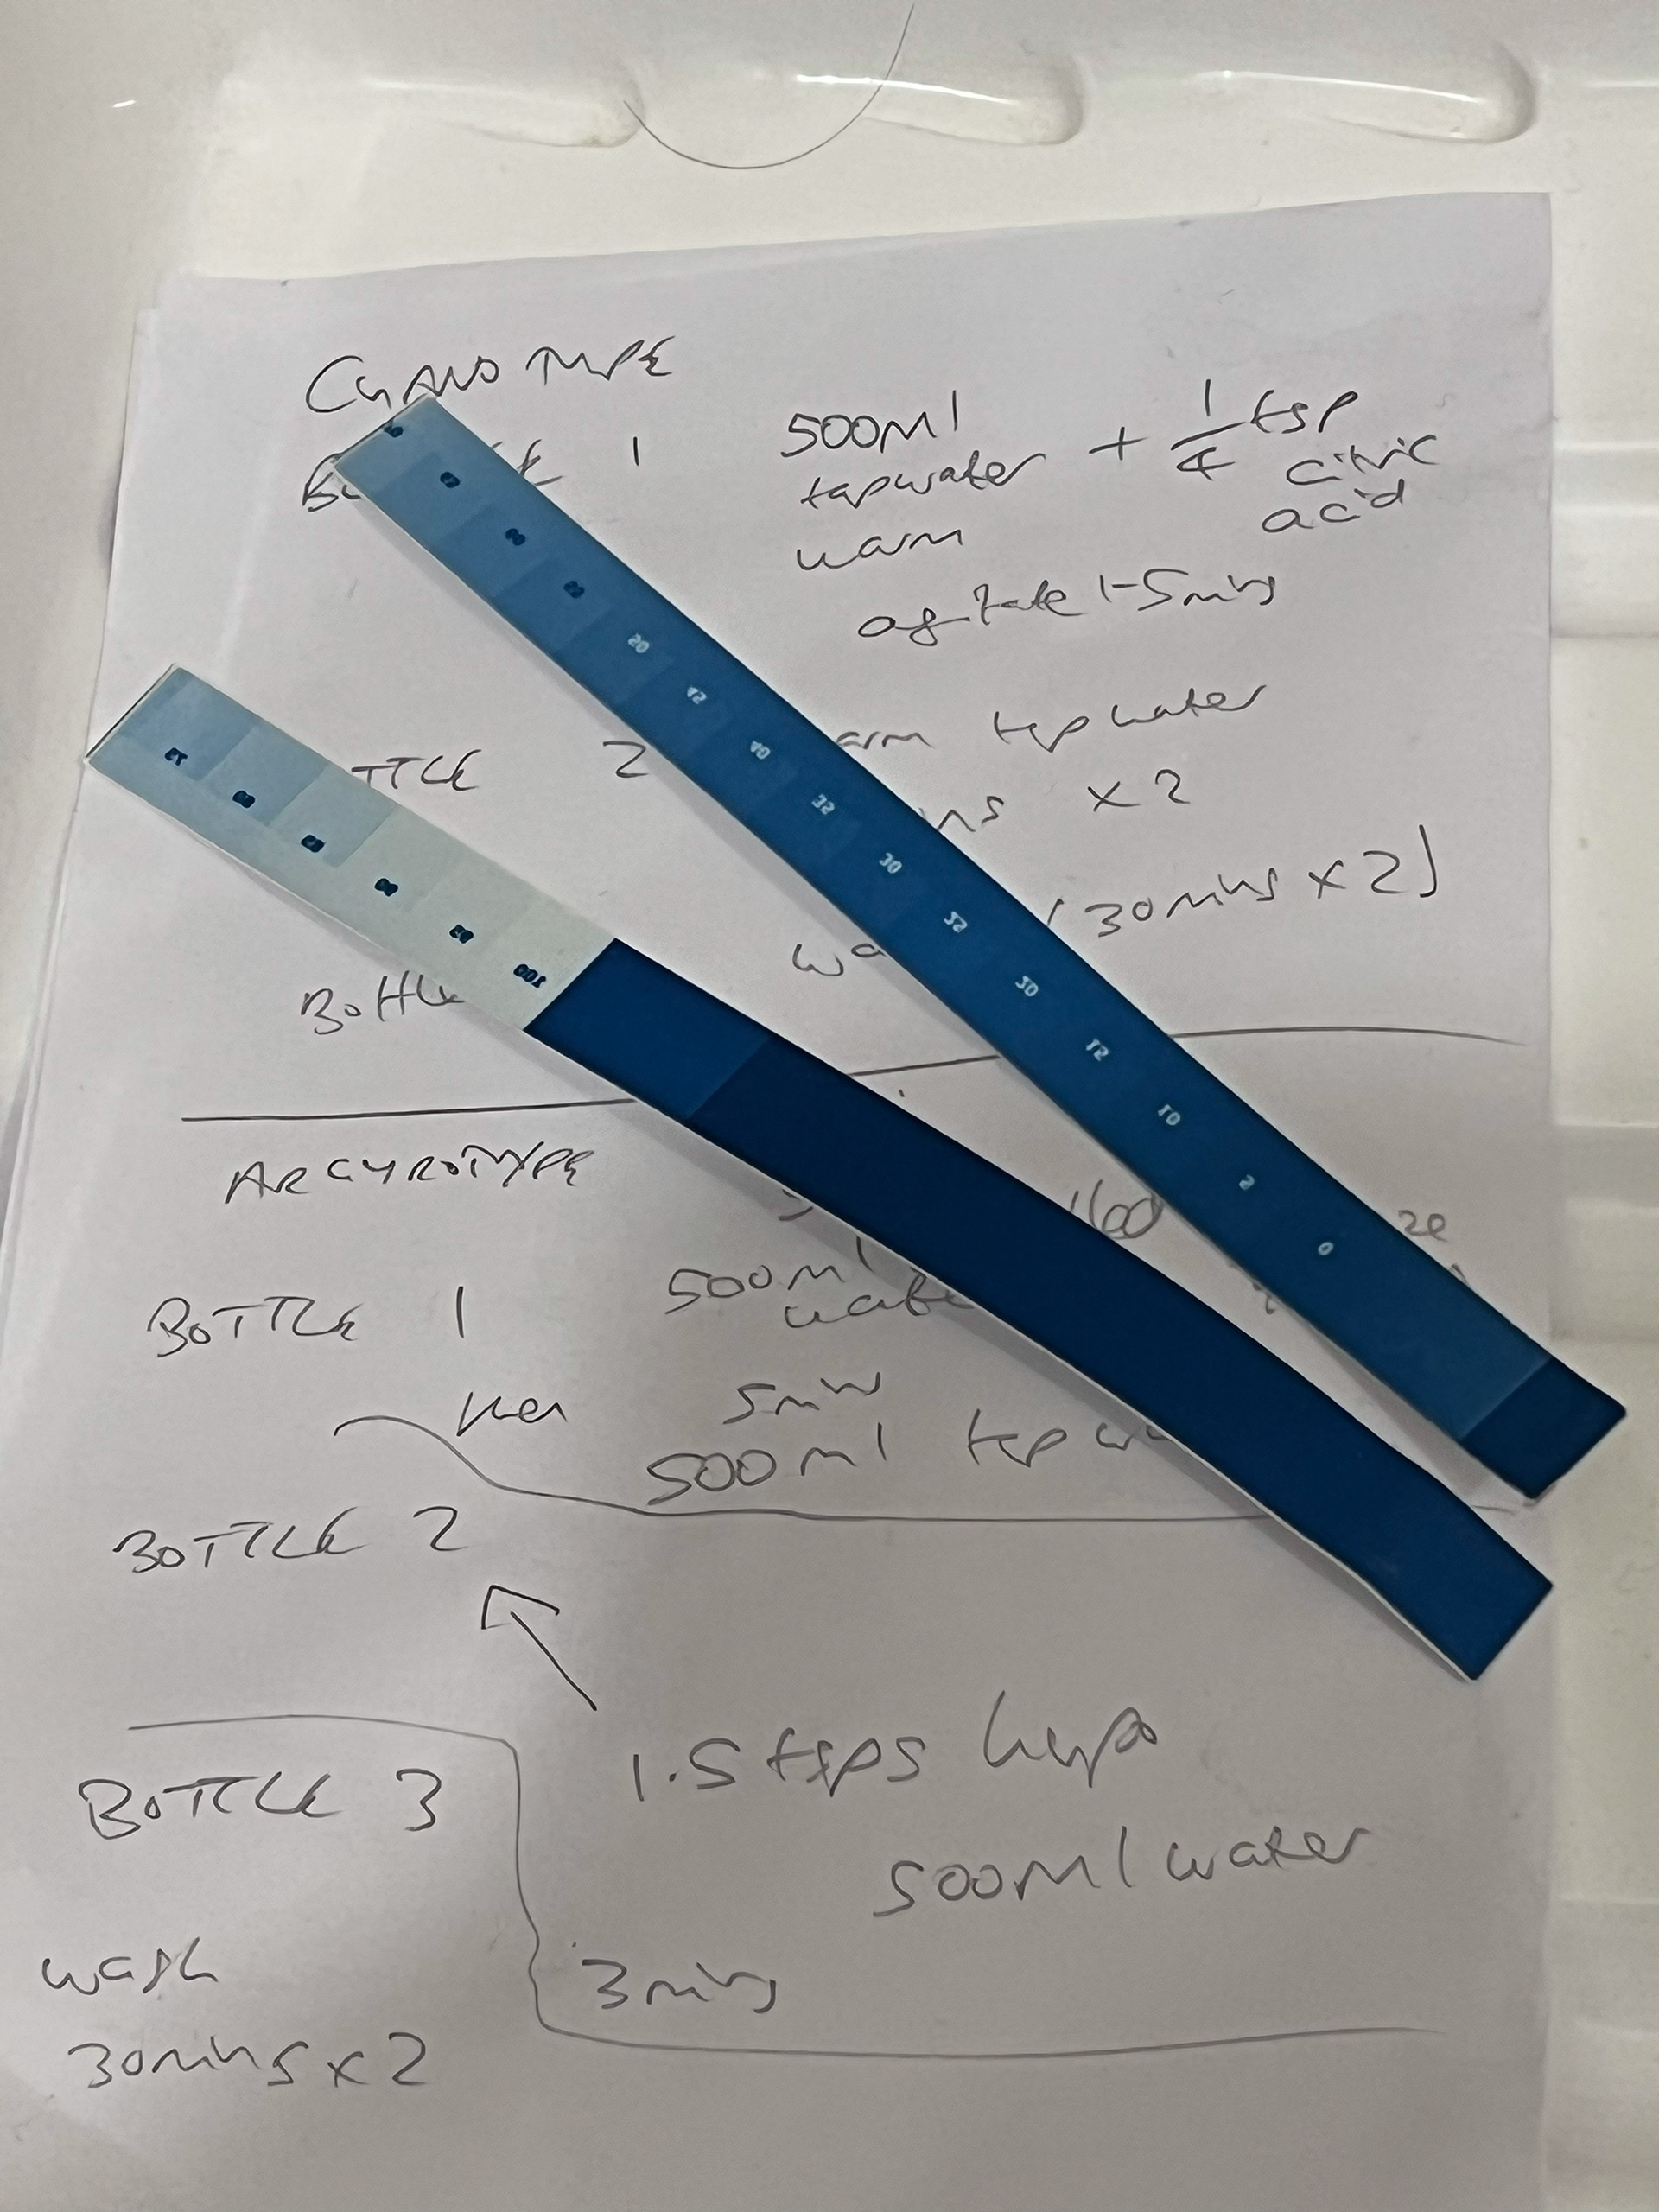
Cyanotype Step Wedges
Argyrotype Step Wedges
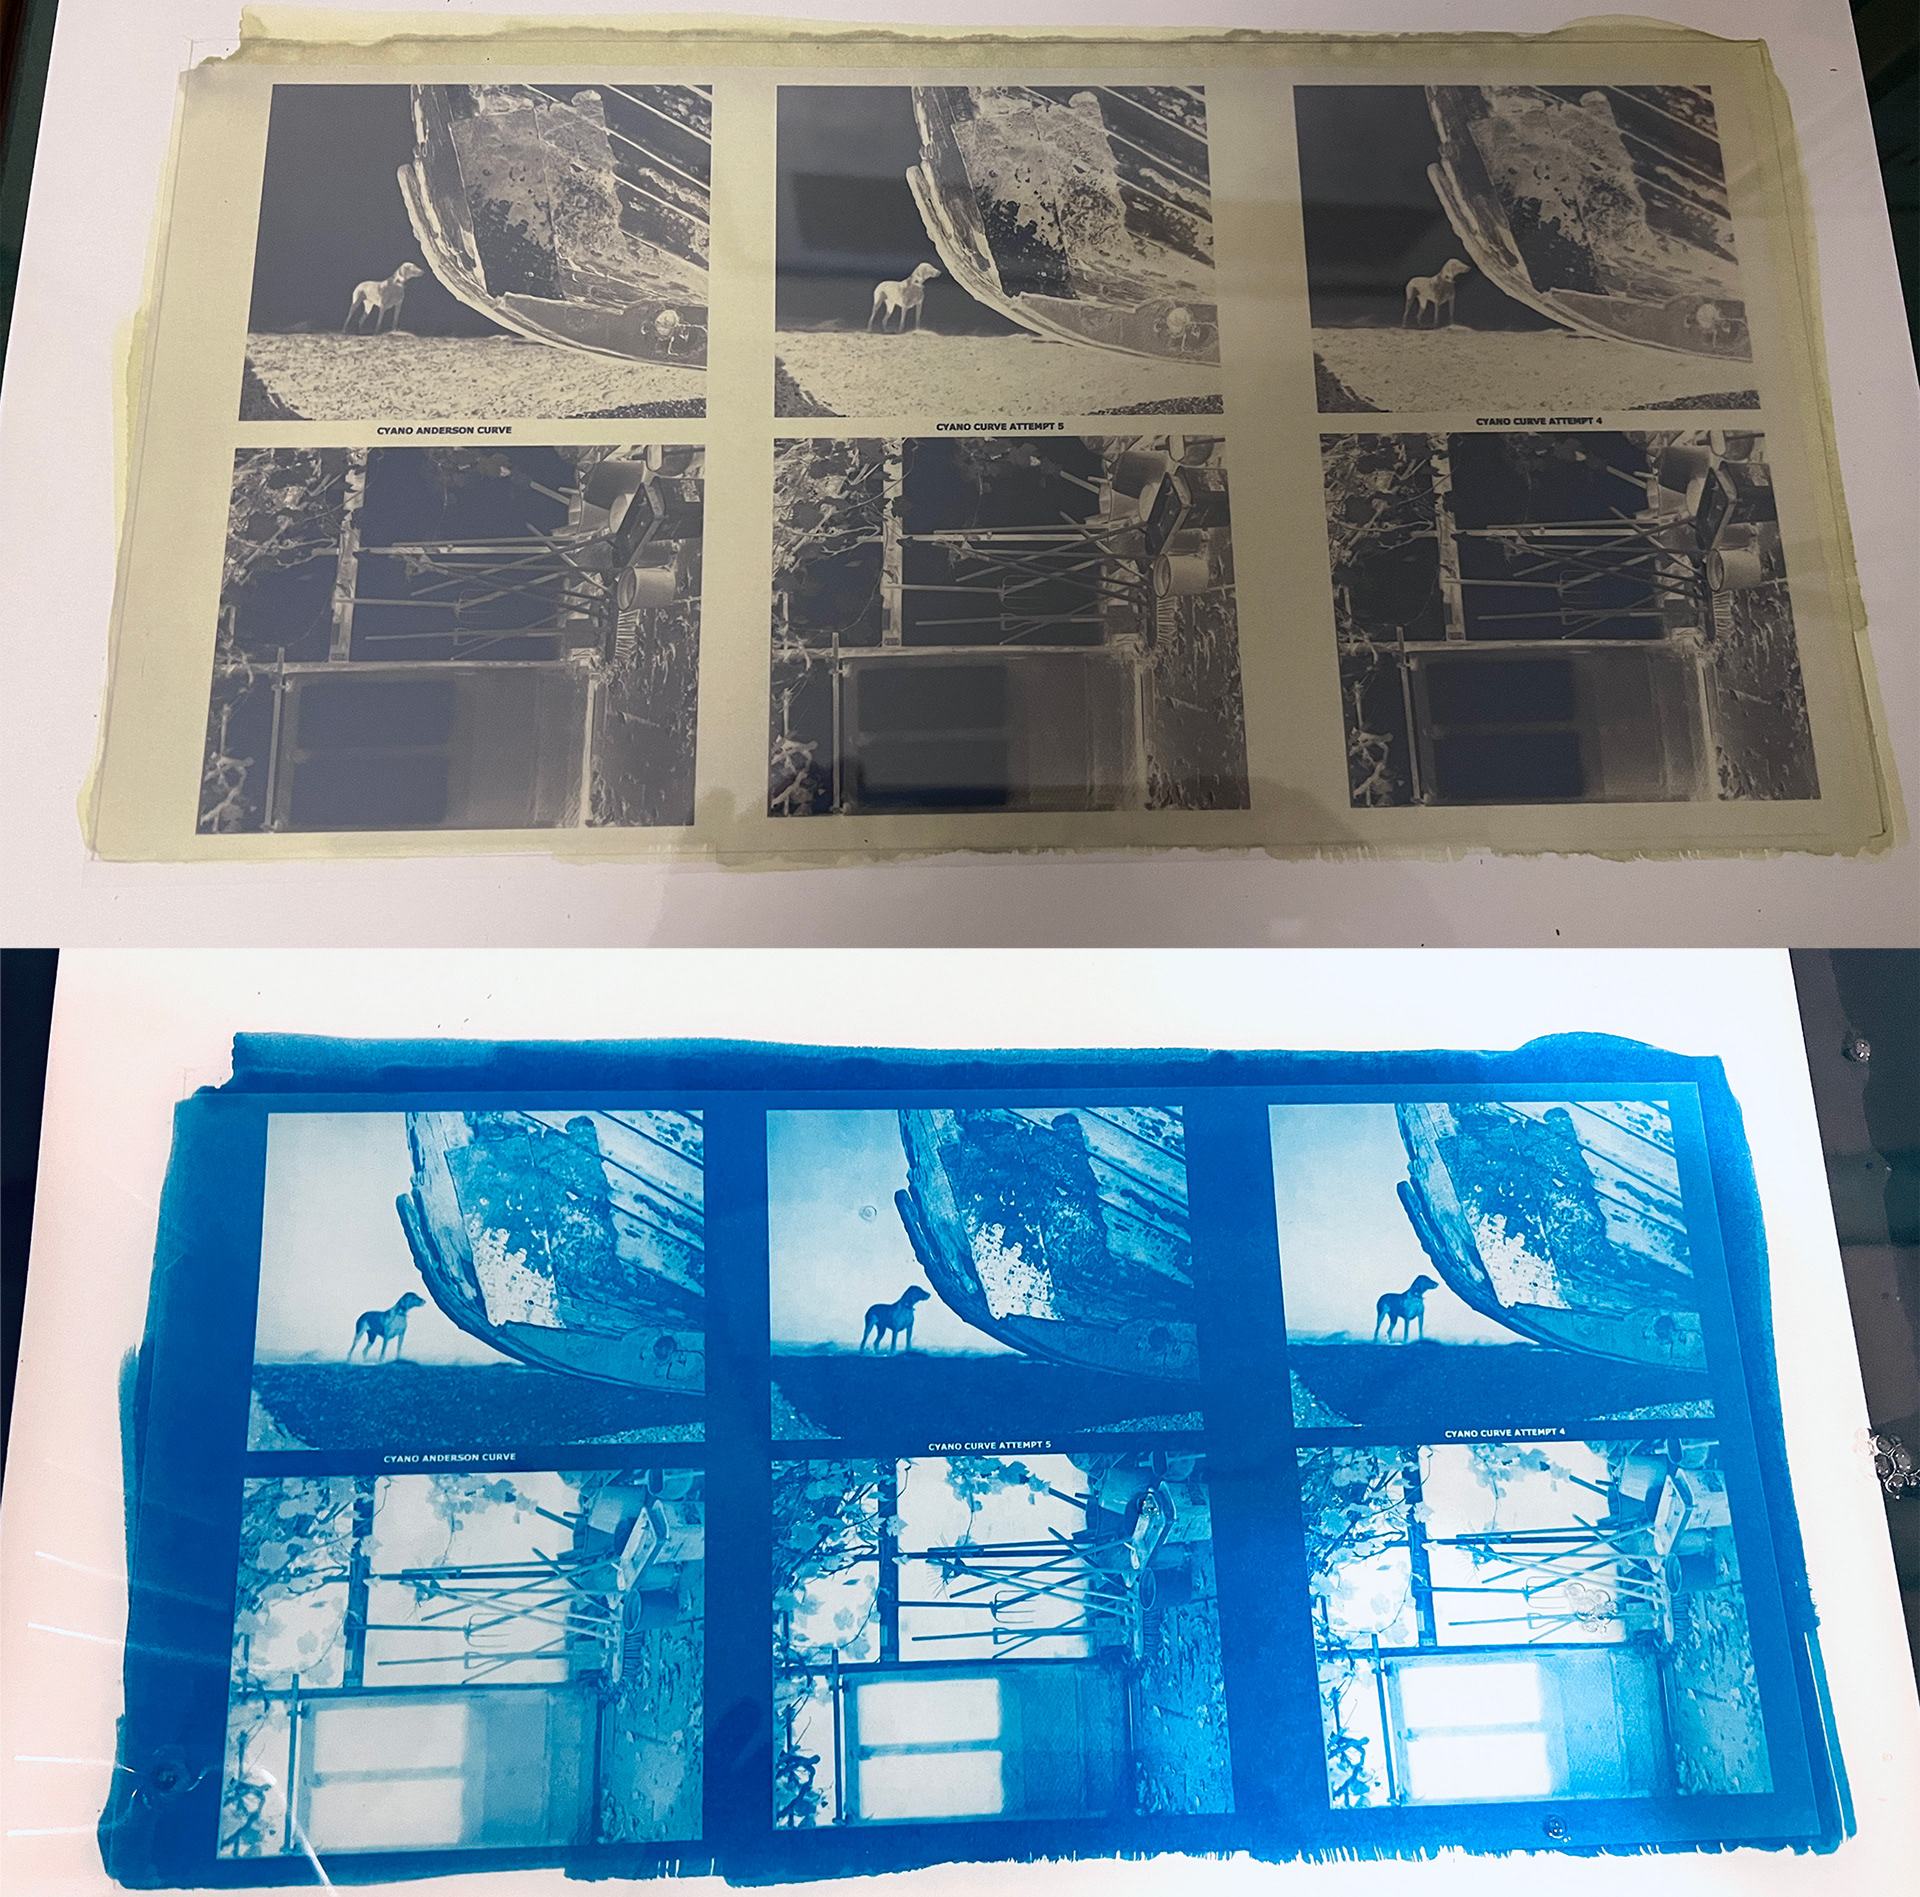
Cyanotype Test Prints with different curves
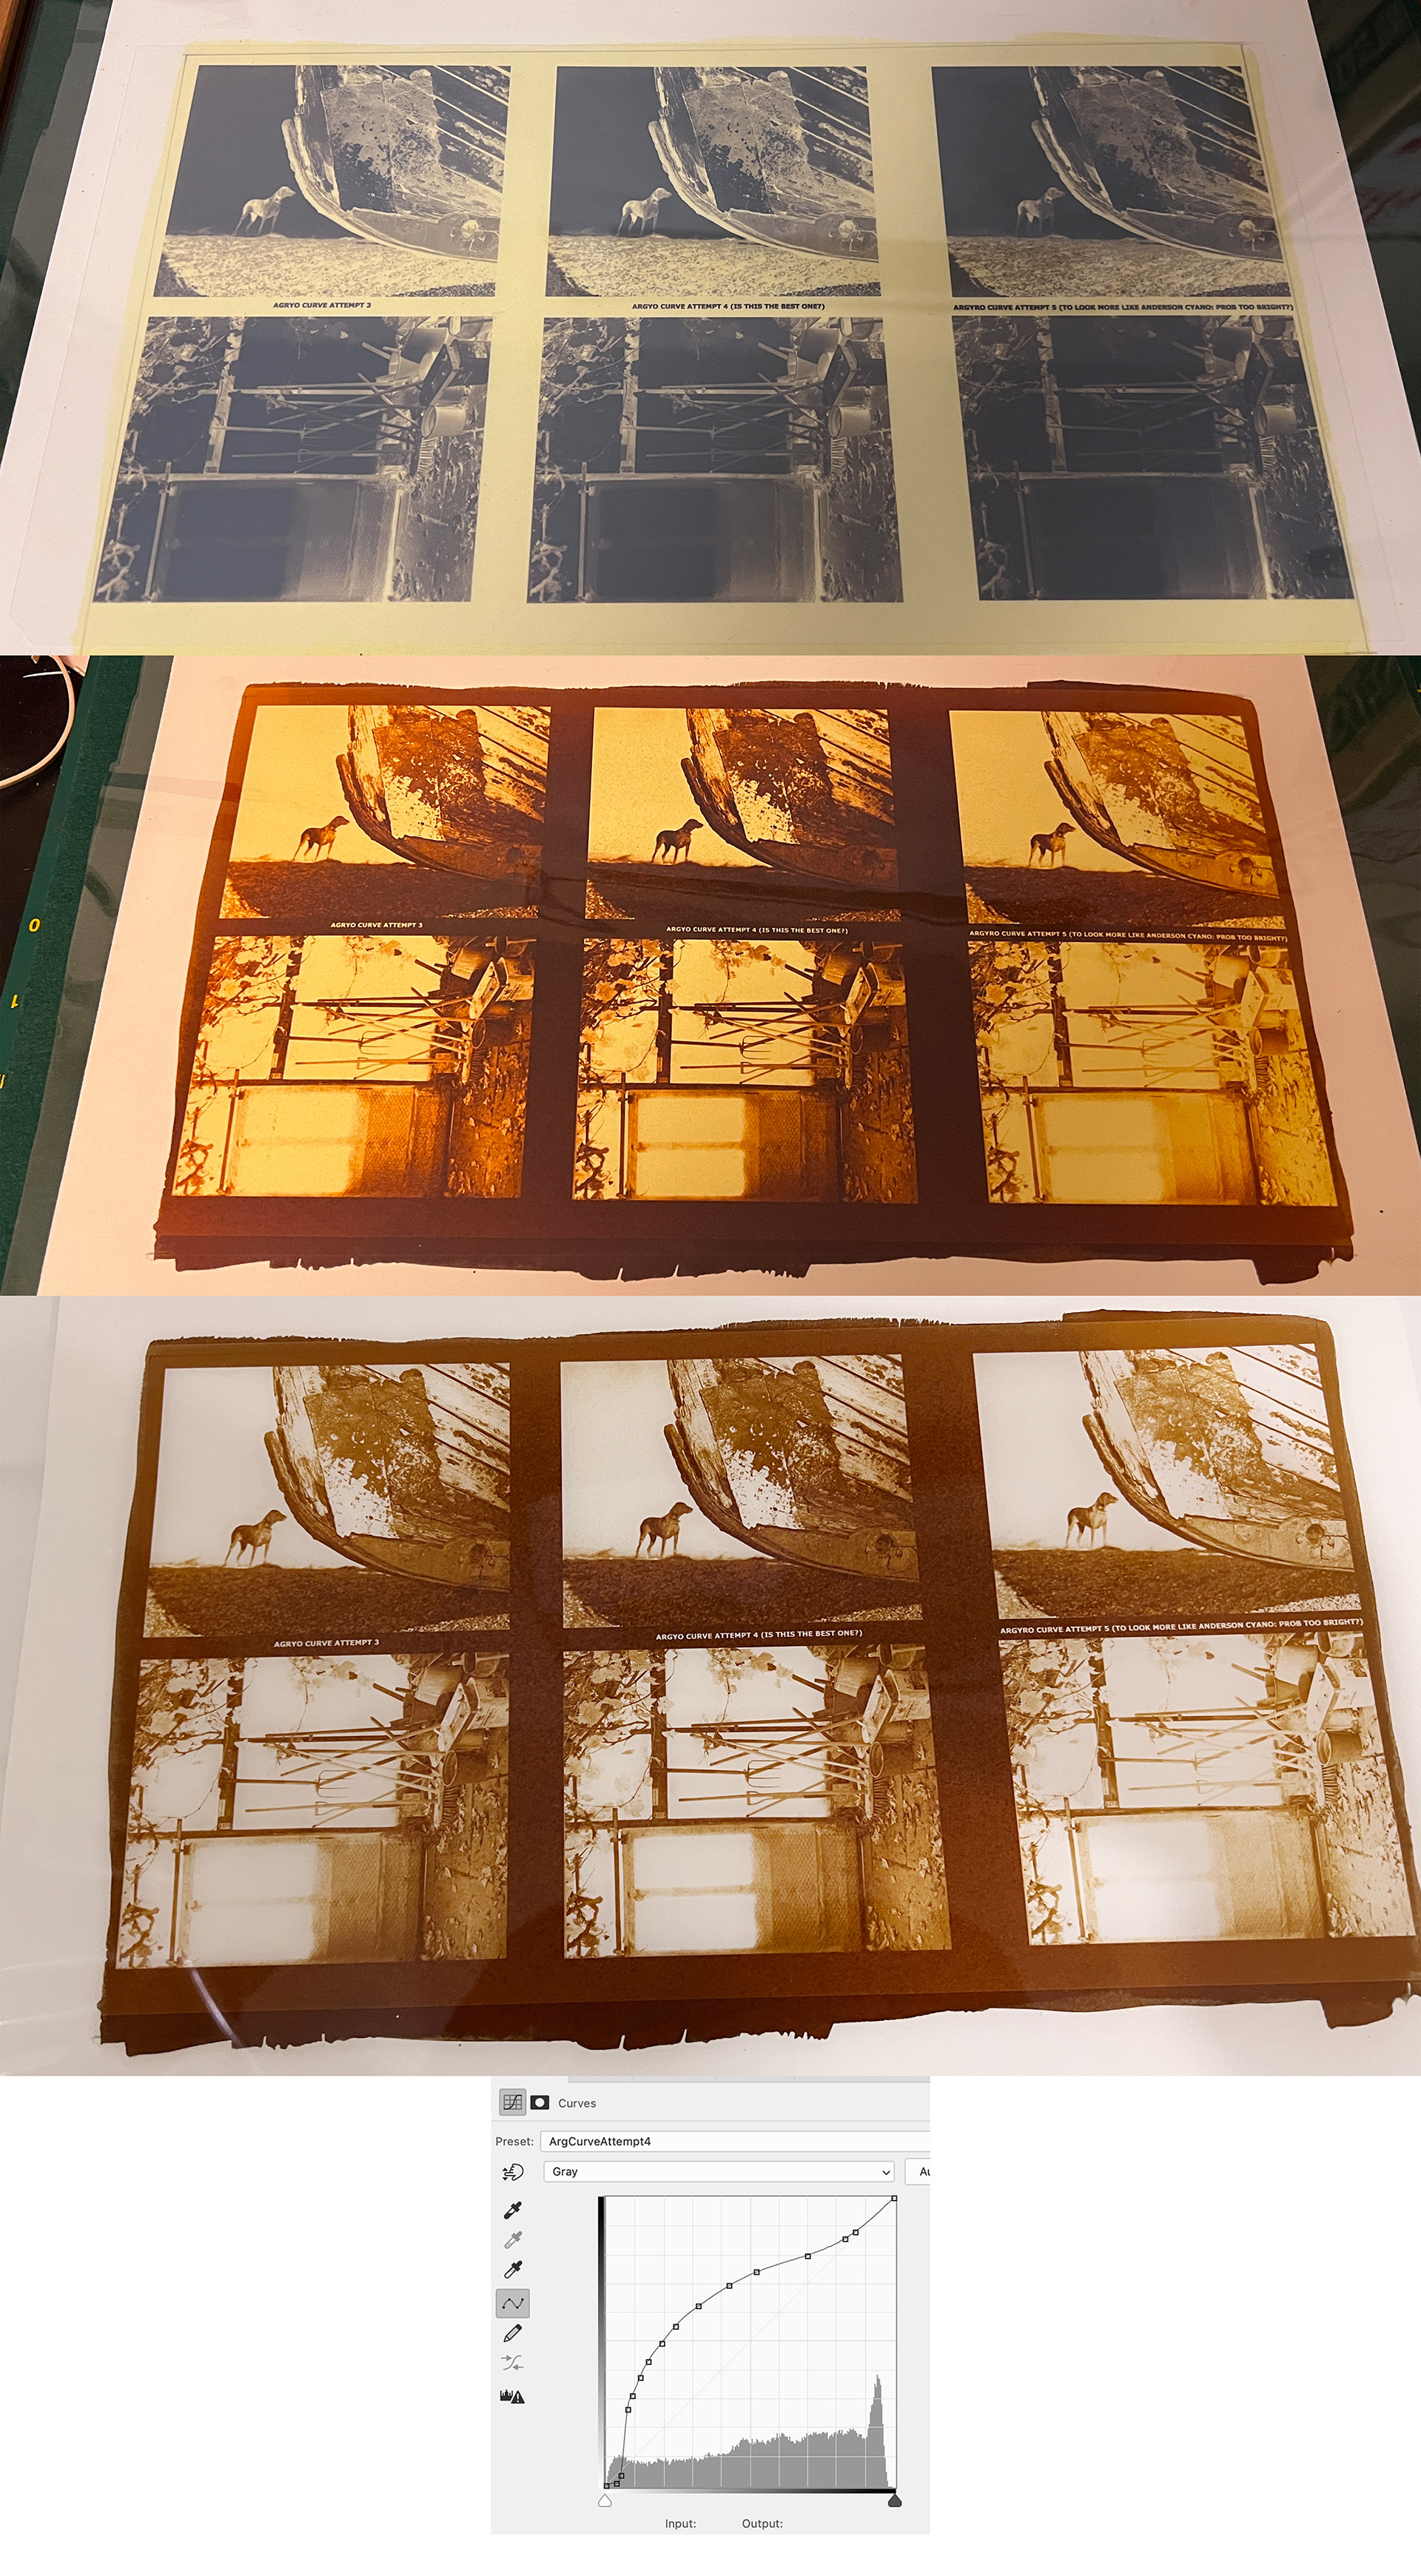
Argyrotype Test Prints with different curves, and chosen curve
What follows is a how-to guide to making curves for alternative processes manually. It makes a number of assumptions:
that you understand what a step-wedge is and know how to make one;
that you understand what a step-wedge is and know how to make one;
that you are already familiar with UV contact-printing of negatives for alternative processes and developing these with whichever process;
that you have a decent ink-jet printer (I actually have a Canon but most people who do this tell you to use an Epson) and can get some Pictorico Pro OHP film for printing the digital negatives on;
that you have a decent ink-jet printer (I actually have a Canon but most people who do this tell you to use an Epson) and can get some Pictorico Pro OHP film for printing the digital negatives on;
that you have a good understanding of photoshop, including how curves work.
For printing the OHP film with a Canon inkjet, you ideally want to adjust the black&white printing tone in the printer driver so that it lays down as much yellow tone as possible - for this style of printing, unlike any other I do, you have the printer set to manage the colour output, not photoshop. It’s worth setting up a preset for this in the driver so you don’t have to do it afresh each time. I’m not an expert on Epsons but Bostick&Sullivan have a video on YouTube giving instructions on how to set up an Epson printer in a slightly more refined way (that also I think requires an extra step-wedge to be printed). Since I don’t have an Epson, my steps may be slightly simplified. NB I am also not using a RIP: my process is done entirely manually, adjusting the curve and judging everything else by eye. This seems intuitive to me, since the whole point for me of using alternative processes is that it’s not about getting digital-style results.
This process also requires you to take a lot of notes. And it requires you to have adjusted the images you wish to print so that they look the way you’re happy with them before you begin.
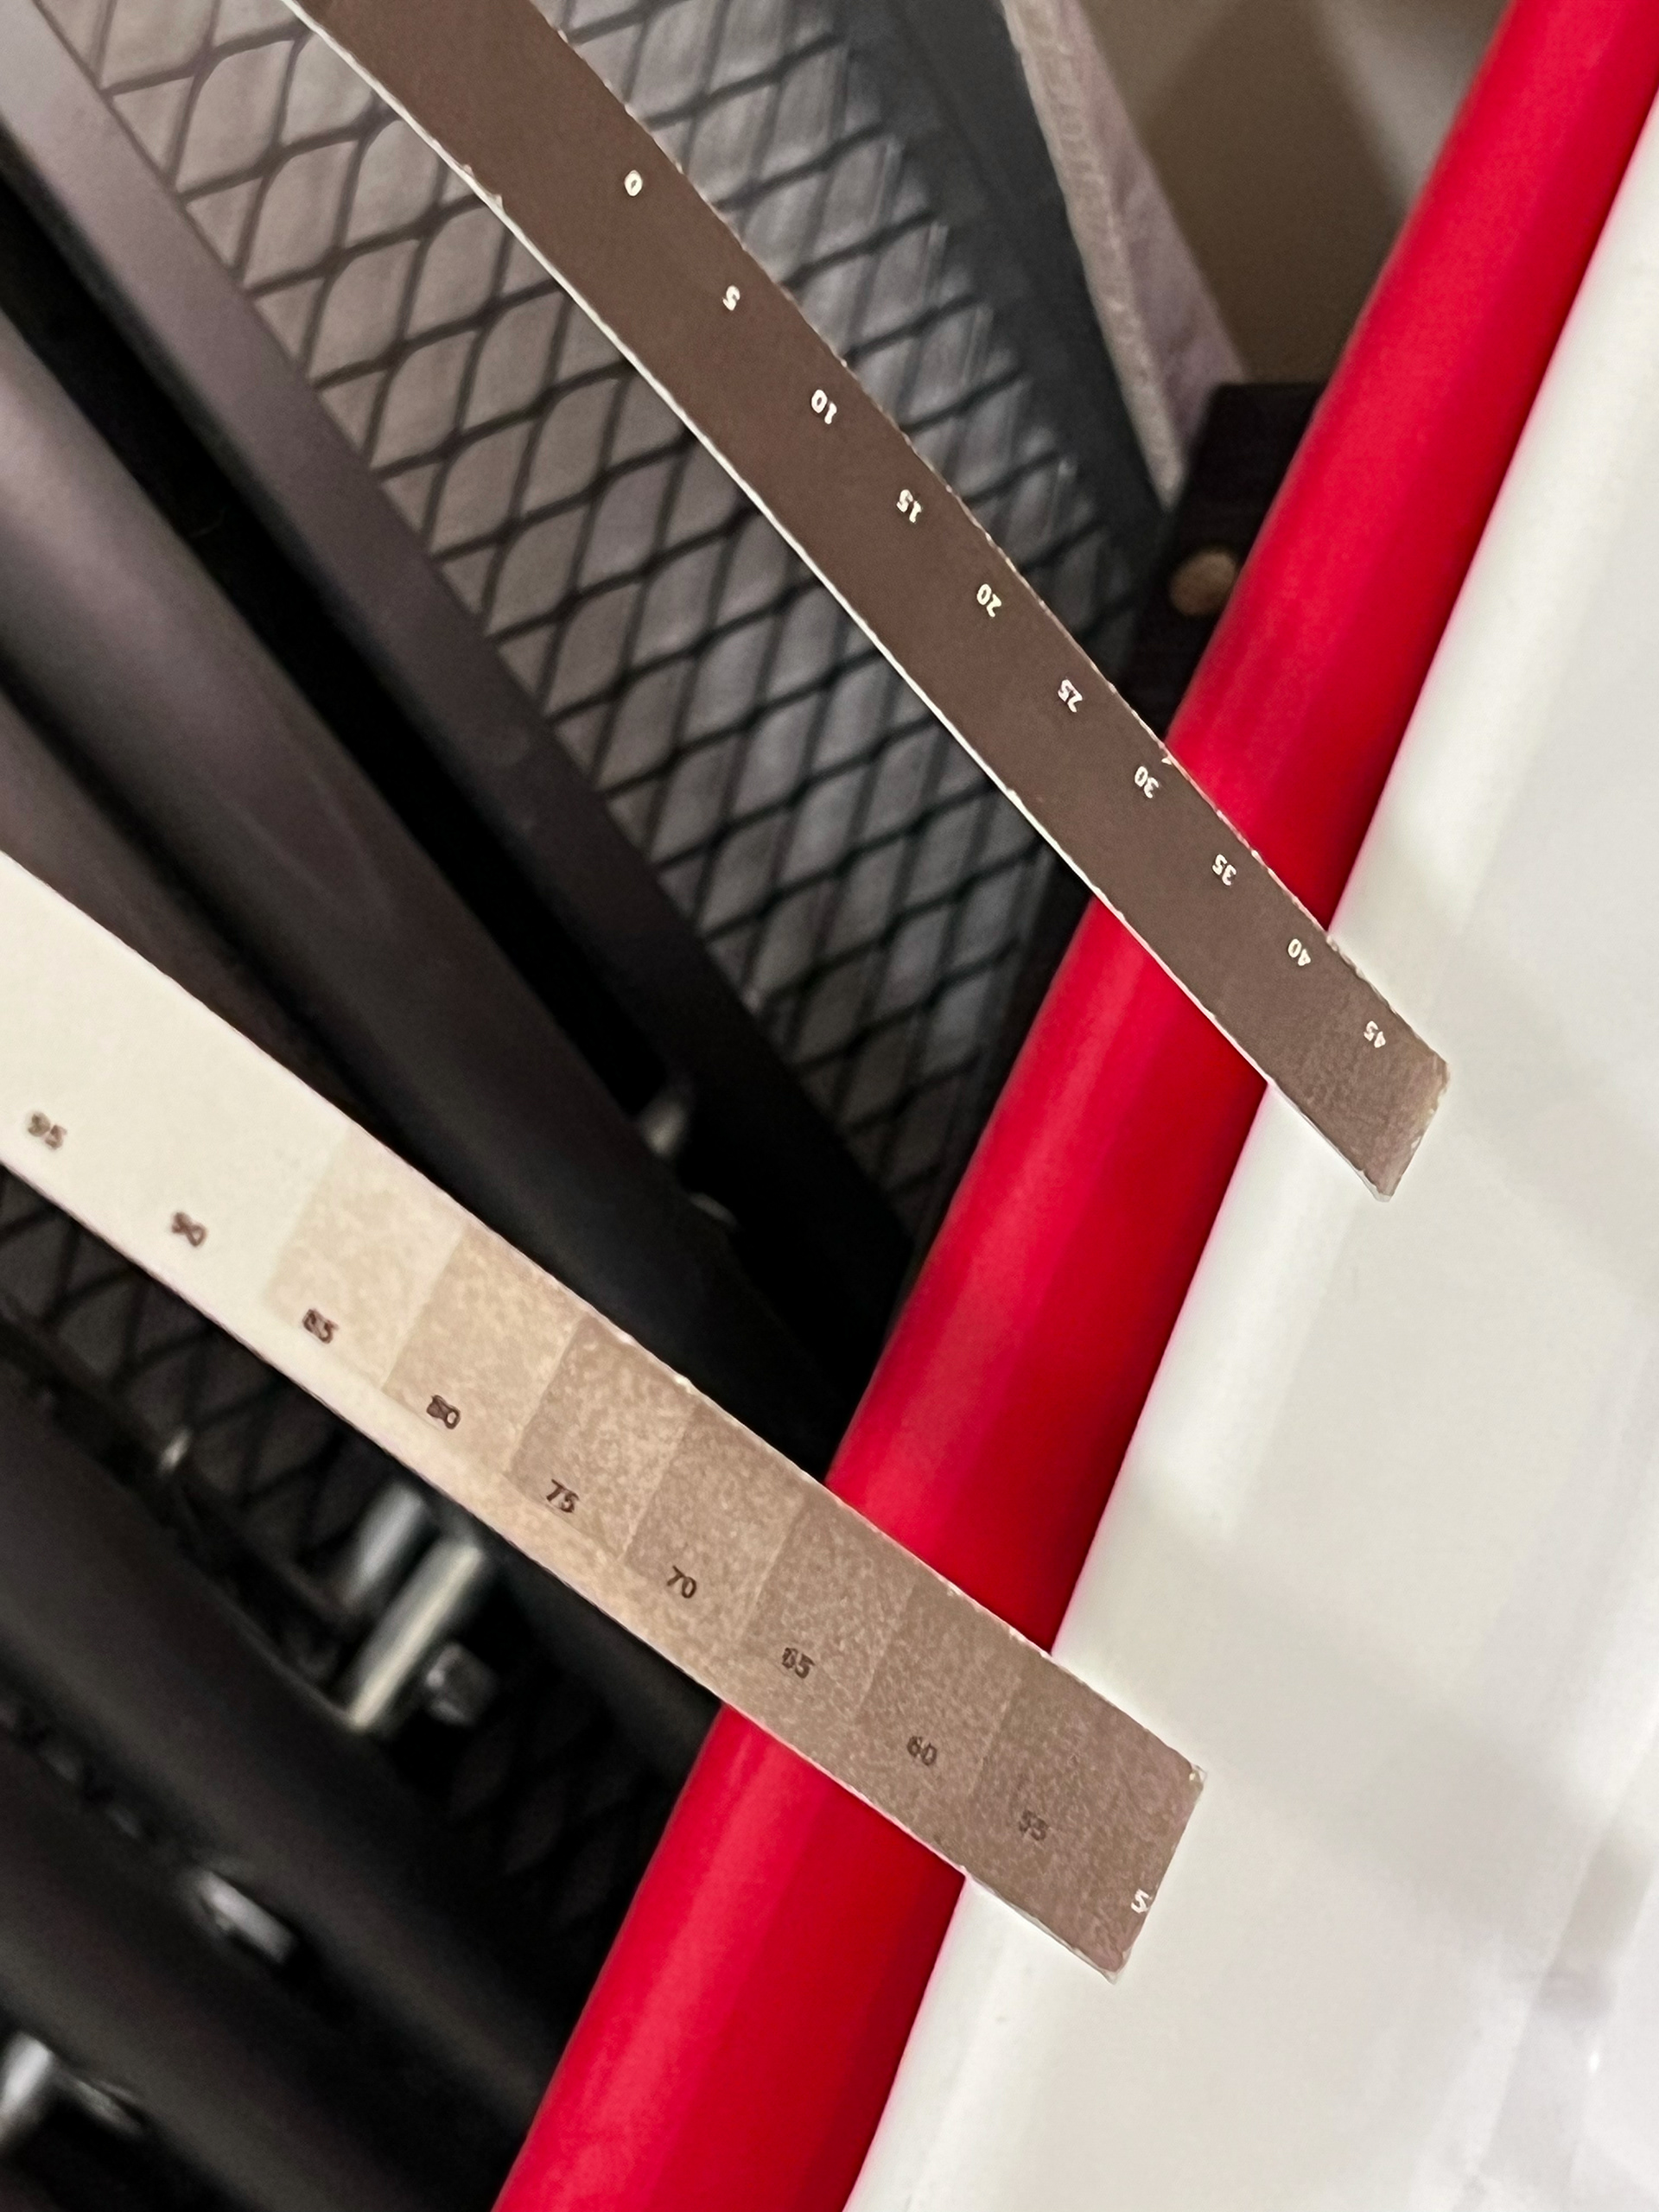
Step 1: Coat a sheet of your desired printing paper with sensitiser for the chosen process, dry it, and cut it into thin strips to make a set of step-wedges. Store these strips in the dark for future use, including in the steps below.
Step 2: Find your maximum black for the process. Do this by making a step-wedge of exposures in your lighting setup with one of your coated strips of paper, progressively exposing strips at, say, 2-minute intervals to whatever time you think, perhaps up to as far as 45 minutes even (which is pretty far but you need to go beyond the printing time you will end up with). Develop and dry, and see where the steps merge to complete unseparated tone, and go with a bit further on from visible difference as your honed exposure time, so maybe a couple of minutes more than where the wedge is completely dark and has no lighter shading left visible.
Step 3: Build a digital step wedge in photoshop, to go from pure black to pure white in 10% intervals of grey (you do this by setting up a sequence of rectangles starting with 100% black fill and copying in more in new layers with lower opacity, 90% down to 10% and pure white).
Set up your printer as well as you can for digital negative printing, using, ideally, Pictorico Pro OHP film. My Canon Pro-300 doesn't have as many refinements as an Epson, so I went with pushing the black & white tint as far to the end of Yellow as possible. This mimics the stain on a film negative developed with a pyro developer, which masks the highlights and extends the range. Epson printers can adjust the amount of ink that is printed, meaning even more contrast in the negative, but this isn't a competitive sport…
Set up your printer as well as you can for digital negative printing, using, ideally, Pictorico Pro OHP film. My Canon Pro-300 doesn't have as many refinements as an Epson, so I went with pushing the black & white tint as far to the end of Yellow as possible. This mimics the stain on a film negative developed with a pyro developer, which masks the highlights and extends the range. Epson printers can adjust the amount of ink that is printed, meaning even more contrast in the negative, but this isn't a competitive sport…
Step 4: Print your digital step wedge on a new strip of sensitised paper, using your newly honed exposure time.
Step 5: Digitize your resulting step-wedge once it has properly dried, using the same method as you would to digitise your finalised alt pro prints (e.g. scanner, or DSLR).
Step 6. Bring this new analogue-print step wedge into photoshop, and juxtapose it with the original digital wedge it was based upon, in a different layer, using a levels adjustment to pull in the black and white points to what seems appropriate. Use an average blur on each section of the analogue wedge to even out the tone. Convert to grayscale, grey gamma 2.2
Step 7. Setup a basic curve with 13 steps from 0.0 to 255.255, at 20-point intervals, but with an extra one at each end (e.g. 10.10 and 245.245) for further refinements.
Step 8. Starting adjusting the points on the the curve, with the aim that your analogue wedge looks like the original digital one: adjust each point on your curve, making sure you are only modifying the analogue-wedge layer. Do this iteratively, saving each curve as a preset as you go when you feel happy with one; use the curve-smoothing tool and start afresh after each iteration. I ended up with 4 or 5 iteratively refined curves. They will steadily improve. Again, you are striving to get the analogue print to match on screen the digital original as closely as possible.
Step 9. Make a sheet of digital negs of prints you want to print using the different curves you want to test. Print it to see how it looks, and choose the best curve to work with - or go back to the start and try making further refinements.
Step 10. Once you have settled on a curve you are happy with for your test print in the given process, use this curve to make a full-size digital negative for your chosen print at the chosen size. With mine, I will aim to print these at 12.5 x 10 inches.
I'm aware that there are RIP software packages, esp. for Epson printers, designed to help with this. But they seem pretty technical, and the results don't appear to me to be particularly better or worse than my method, which involves working by inspection, and figuring out how the curve affects the various tones on the step wedge in comparison with the idea original by eye.
Obviously I have also been very much used to trial and error (and refining technique) with large-format film, and this digital neg business feels like a bit of cake-walk by comparison!
Enjoy...